
How to Use Notion Teamspaces: The Simple Way of Organizing Your Workspace
When you collaborate with people, either as a “company of one” or as a structured organization, it may be a good idea—depending on your specific circumstances—to compartmentalize your work and define clear responsibilities within your team. This fosters personal responsibility and understanding how every role fits into your team and the broader organization.
There are three fundamental levels of resolution in an organization (business): the organization, the teams within the organization, and the individuals composing those teams. Providing individuals with clear responsibilities and sufficient degrees of freedom to encourage experimentation can be a great component of a solid organization. When a group of individuals work together on a specific area of responsibility, they form a team. The team is the backbone of the organization and adds mental clarity for every individual within the business. Ultimately, the organization is composed of individuals, who are the propellers of the entire functioning of the “machine”.
When you collaborate with other people, either as part of a team or as a “company of one”, you may need a clear collaboration system to ensure you can all live a pleasant experience as part of the work process. A clear collaboration system starts with shared principles you intend to follow for collaboration (e.g., do you track hours, what tools do you use for internal communication, what tools do you use for keeping track of your projects status, and many more fundamental questions). This guide from Basecamp can be a source of inspiration on this front.
If you use Notion as the software to collaborate within your team, the latest teamspaces feature adds the necessary clarity and compartmentalization of your organization. Teamspaces are available for teams and enterprise Notion accounts. They enable you to create mini-workspaces within your broad Notion workspace.
You can think of Notion teamspaces as exclusive areas of your office. Notion is your general office. If you are an early stage startup, you may have a completely open-space office, where structure and regulations don’t matter because you’re deeply focused on building something of value and testing its market fit for now. If you are a more mature organization, you may have some compartmentalization within your office, with one big room per company area (department). Still, everyone can enter and exit the department rooms as they wish (Notion teamspaces in the team plan). Or you may have a very big office with many department areas, and some rooms are off limit and only accessible by a few selected people because they contain very sensitive information (enterprise plan).
How to Set Up Notion Teamspaces
Teamspaces are available on teams and enterprise plans in Notion. We will delve into the differences between those two plans in the next section of the article. For now, let’s analyze what a “teamspace” looks like and how to set up one.
If you are on a team or enterprise plan, you have one default teamspace, called “General”. You need to have one default teamspace accessible by everyone in your organization within Notion. Your “General” teamspace may be your welcome hub, where every team member can find any information and context they need regarding your use of Notion, and wiki guides or general company information (e.g., mission, vision, values).
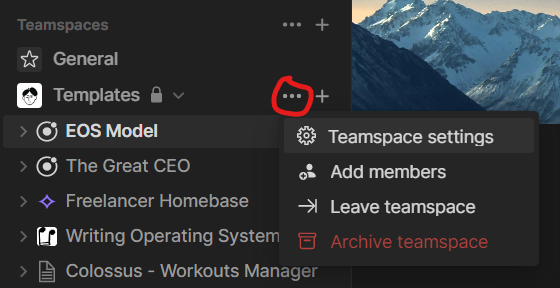
When you click on the three dots next to the teamspace name, you can change a teamspace name, description, and permission levels. Teamspace permission levels differ a bit from workspace permission levels. In your Notion workspace, you have “workspace owners”, “members”, and “guests”. In your Notion teamspace, you can define “teamspace owners” and “teamspace members”. Your default teamspace will inherit your workspace permission settings by default. You can change that from the “permissions” tab. “Guests” in your workspace will not have access to your teamspace by default. Guests still need to be added only to the specific pages you want them to access.
Example Use Case: Department Teamspaces
One example use-case for teamspaces are “departments”. When managing an organization, you may have multiple areas of responsibilities or departments that enable you to compartmentalize your jobs to be done. You can break down those areas of responsibilities into multiple teamspaces (one per area). So that users don’t get overwhelmed by the amount of information they can find on a Notion page.
Each user is part of their own area of responsibility, which has the potential to reduce the clutter significantly. Each area of responsibility would have their own dashboard (an essential feature of teamspaces), and any other components as needed. The left sidebar menu would become significantly cleaner and easier to navigate.
Example Use Case: Client Portal
A more advanced and nuanced use case for Notion teamspaces for agencies or freelancers are “client portals”. You could create one teamspace per client, and give your clients access only to their teamspace. You can do so in two ways: either you have the Enterprise plan, and you create “closed” teamspaces only viewable by the interested stakeholders. Or you can invite your clients as guests only to the pages within their dedicated teamspace. The latter option is economically more viable because “guests” are free.
One potential limitation of client portals in Notion is this: if you want to have both a “master” database and a “client portal”, you would need to share the master database in order for the client to see their tasks. This is very likely not feasible for you. As a potential solution to this problem, you may consider using one unique “tasks” database per client, as part of their teamspace.
Then, you would create a private dashboard for yourself, where you can use “/linked view of database” to see all your tasks in one page, broken down by client. This would merely be a one-time process for yourself to complete every time you create a new client portal.
A more “advanced” option as of October 2022 is to set up automation to centralize your tasks for you. Make is one of the best no-code/low-code API solutions for Notion as of today (October 2022). In this scenario, you would:
Use a unique “tasks” database per client portal
Create a private, centralized “tasks” database for yourself (not accessible by clients)
Use the API to sync tasks between your client-visible “tasks” database and your private “tasks” database. This would require at least 2 separate automations (one for
creatingtasks, and one forupdatingtasks).You will need to set up a new automation for every client portal you have (once you set up the first one, you could merely clone it and update the database IDs).
What Are Notion Teamspaces - The Details
Depending on your Notion plan, you have some feature differences in teamspaces. If you are on the “Team” plan, you can’t have “private” teamspaces. “Private” teamspaces are only visible and accessible by the people you invite to those teamspaces. Anyone else can’t see them. “Private” Notion teamspaces are only available on the Enterprise plan.
“Open” and “Closed” teamspaces are also available on the “Team” plan of Notion. The content within “closed” teamspaces is exclusively accessible by the the teamspace members. But anyone can see the existence of “closed” teamspaces, and they can freely request access to them. “Open” teamspaces are accessible by anyone (without the need to request access). Your default teamspace will always be “open”.

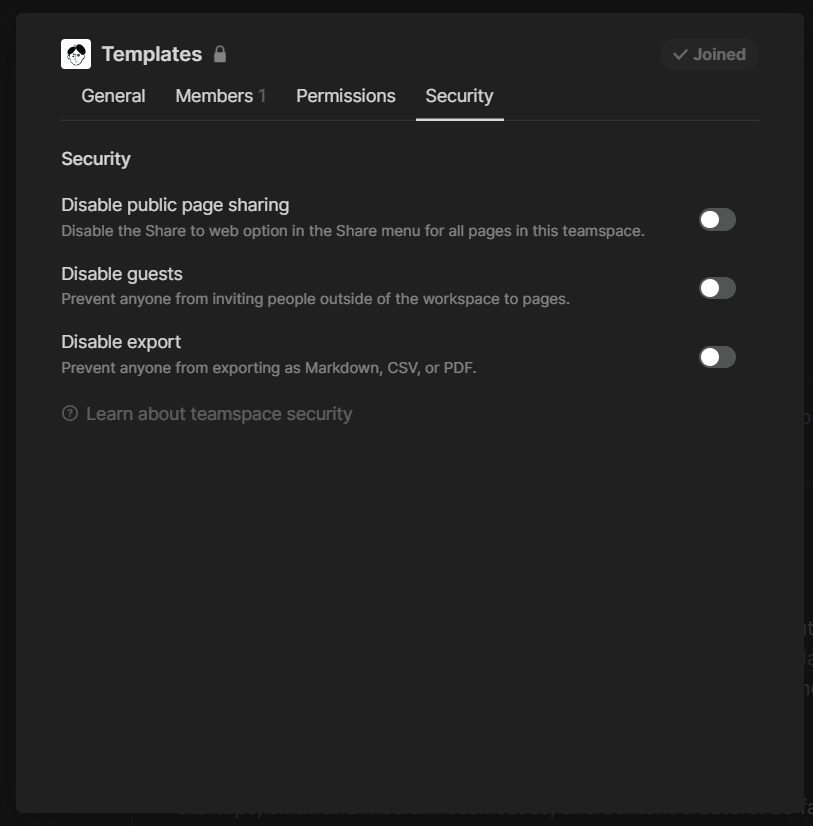
When it comes to security settings, you can disable public page sharing on any teamspace (no matter what plan you’re on). You can also disable guest-sharing permission. This would prevent anyone in the teamspace to invite guests to specific pages. Finally, you can disable export of the teamspace content. These settings can only be manipulated by “teamspace owners”.
I write a weekly newsletter to reflect on curated content from the internet and important psychological concepts to live an examined life. You can read previous issues and/or sign up here.USEFUL AFFILIATE LINKS
Get up to $1,000 in discount on a Notion team plan (for startups)
Get one free month on the pro plan in Make (automation software)
Get 20% off any Centered subscription (deep work sessions tracker with AI coaches) by using the discount code “
SIMONE20”here.